This section will give you an overview of the basic interface of Ardour.
We will take a look at the Editor Window and the Mixer Window. Later chapters will give more detailed information on each feature listed here.
The Editor Window
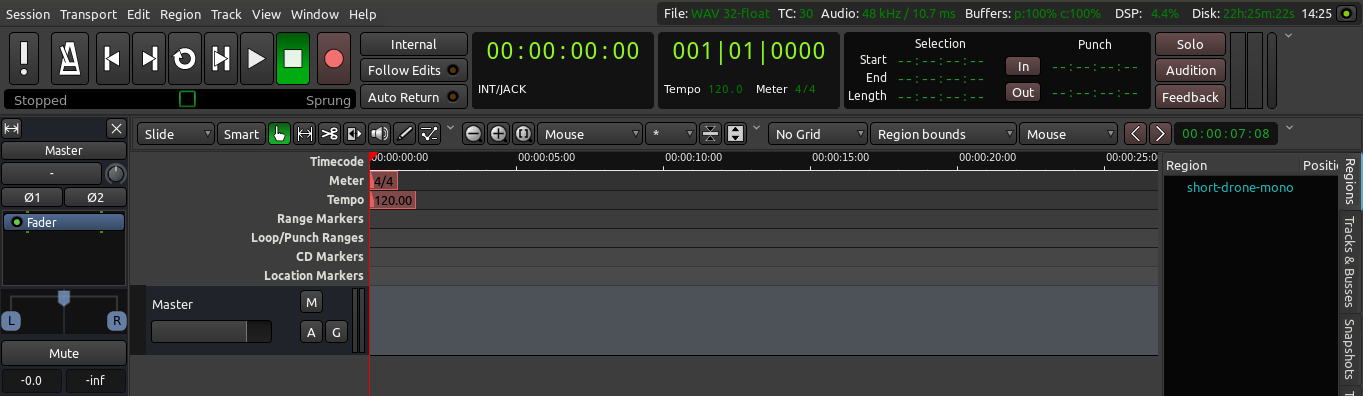
When you create a new session, Ardour opens an empty new window called the Editor Window. The Editor Window is the most important window in Ardour, as this is how you will control the program as well as see and edit the audio you have recorded or imported.
At the top of the Editor Window are several main areas: the Transport Menu, the Clocks, the Edit Modes/Cursor Modes menu, the Snap Mode menu and the Auxiliary Controls. Below that area is the Main Canvas, which contains the Tracks and Busses used in the Session. The Mixer Strips for the Tracks appear on the left, and a set of tabs allowing for an overview of the Regions, Tracks/Busses, Snapshots, Edit Groups and Chunks appear on the right. The very bottom of the window is the Summary view, which is a miniature timeline view allowing for quick navigation through the session.
We will introduce these controls briefly here and cover them more extensively in dedicated chapters later on.
Transport Menu
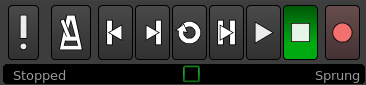
The Transport Menu controls include the following buttons:
- MIDI Panic
- Enable/Disable audio click (metronome)
- Rewind
- Fast forward
- Loop playback
- Play range/selection
- Play from playhead
- Stop
- Record-enable
- Jog/shuttle controls
Clocks

The main Clocks are located next to the transport controls. Clocks in Ardour can display time in 4 different formats: Time Code, Bars:Beats, Minutes:Seconds, and Samples. Right-click on the clock to select a format. You can also turn the clock off. The reason for having two transport clocks is that it allows you to see the playhead position in two different time units without having to change any settings.
Please see the Setting Up the Timeline chapter for more details on the Clocks.
Edit Modes and Cursor Modes

The Edit Modes and Cursor Modes controls define the behavior of the main canvas and the different functions the cursor can have. There are three Edit Modes in the drop-down menu: Slide, Ripple, and Lock. To the right of the Smart button are the Cursor Modes:
- Smart Mode (shortcut “Y”)
- Grab Mode (shortcut “G”)
- Range Mode (shortcut “R”)
- Cut Mode (shortcut “C”)
- Stretch Mode (shortcut “T”)
- Audition Mode
- Draw Mode (shortcut “D”)
- Internal Edit Mode (shortcut “E”)
Most of them are discussed in the Working With Regions chapter. The last two are discussed in the Using Automation chapter.
The Smart Mode is actually a combination of Grab Mode and Range Mode. When enabled, the mouse behaves as if it is in “Range Mode” in the upper half of a region, and in “Grab Mode” in the lower half.
Snap Options

The Snap Options menu controls the Grid, Grid Points and Edit Point. Please see the chapters on Setting Up the Meter, Using Ranges and Working With Regions for more details.
Zoom Options

In between Cursor Modes and Snap Options are the Zoom Options. Here you can define the behavior of zooming operations. You have standard Zoom In and Zoom Out buttons, plus a third called Zoom to Session (useful for having a quick overview of your entire session: it zooms it to fit the available space on the screen).
TIP: use the shortcuts = (the equal sign on your main keyboard) for Zoom In, and - (the dash key on your main keyboard) for Zoom Out.
The drop-down menu controls the Zoom Focus. It defines the focus point of zooming operations. Try zooming in and out with a different Zoom Focus each time. For example, choosing Playhead will cause zoom to behave in relation to the position of the Playhead. Mouse will take your current mouse position as the reference, and so on.
The following drop-down menu and the last two buttons control “vertical zoom.” They allow you to expand and shrink all tracks and busses vertically. Use the drop-down menu to choose a specific number of tracks you want to fit on the screen. Use the buttons to shrink or expand all tracks (or only selected tracks, if a selection is made).
Auxiliary Controls
For further information on other buttons and displays on the main interface, please refer to the Ardour Manual at http://manual.ardour.org/
Main Canvas
The main canvas is just below the top rows of controls described above. It basically comprises the Rulers, the space where Tracks and Busses are displayed, and a Summary view at the bottom.
At the very top of Ardour’s Editor Window (to the right) you will find useful information such as sample rate of the session, available recording time, and DSP use.
Rulers
Right-click on the names of rulers and you will see a menu with all the possible rulers at your disposition. You may uncheck rulers that you don’t need in order to save screen space. More information on these operations can be found in the Setting up the Timeline and Setting up the Meter chapters.

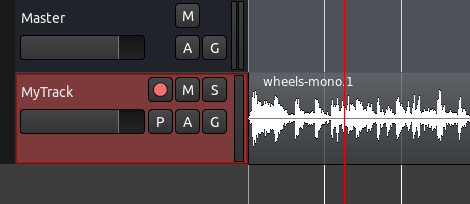
Tracks and Busses
Just below the Rulers is where Tracks and Busses are displayed. In the example below, you can see one Bus called “Master” and one Track called “MyTrack”. MyTrack also contains one region, which represents an audio file with a drawing of its waveform. More information on Tracks and Busses can be found in the Creating a Track or Bus chapter.
Editor Mixer
The Editor Mixer is located at the left of the Edit Window. It displays the Mixer Strip of the currently selected Track or Bus. It controls the volume, Plugins and Routing for the Track or Bus to which it corresponds. You can toggle to view or hide the Editor Mixer by clicking on the menu View > Show Editor Mixer (shortcut “Shift” + “E”). This Mixer is covered in the Using the Mixer Strip chapter.

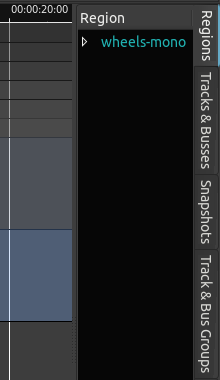
Regions, Tracks/Busses, Snapshots, Groups, Ranges, Marks
The space on the right of Ardour’s Editor Window can have 5 different functions, depending on which tab is currently selected: Regions, Tracks/Busses, Snapshots, Track & Bus Groups, and Ranges and Marks. Regions is the tab selected by default. This part of the Editor Window is commonly referred to as Regions List. Regions represent audio files stored on the hard drive which can be dragged from the Regions List directly onto a track in the main canvas. More information on Regions can be found in the Working With Regions chapter. The Tracks tab is covered in the Arranging Tracks chapter, and Snapshots are discussed in the Saving Snapshots chapter.
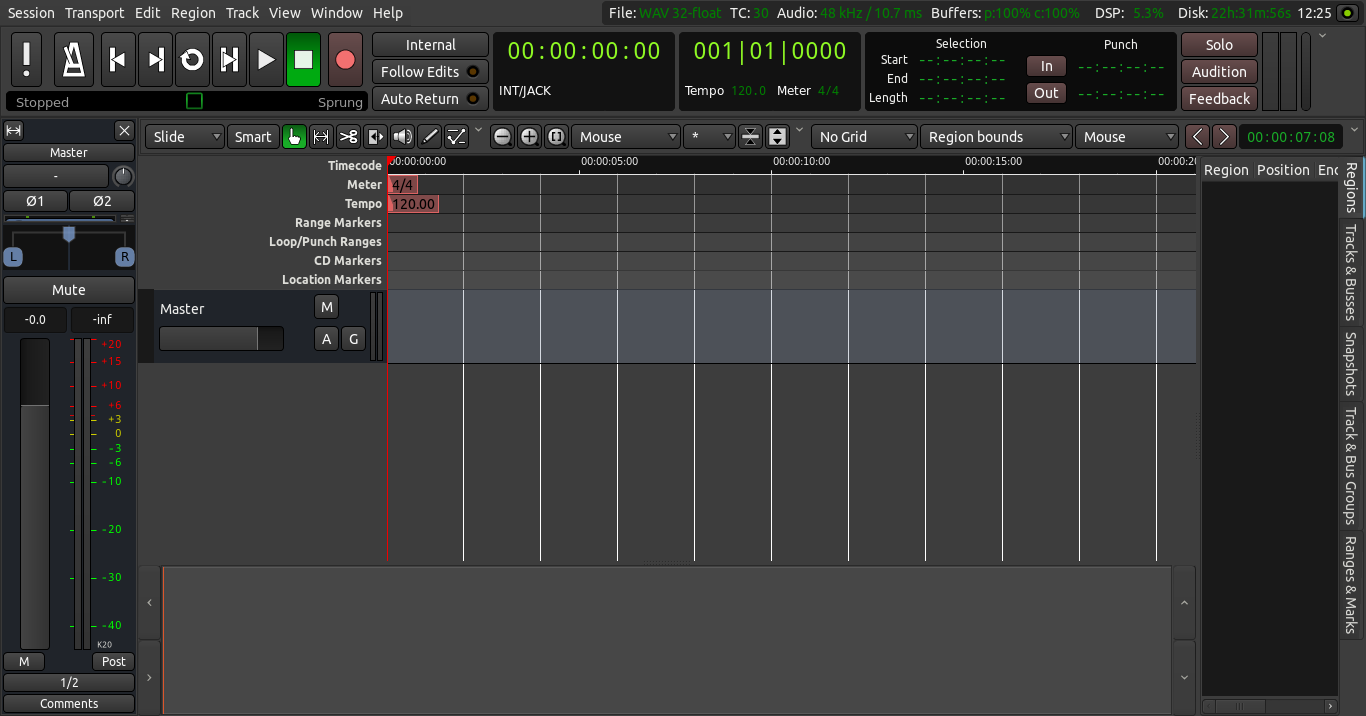
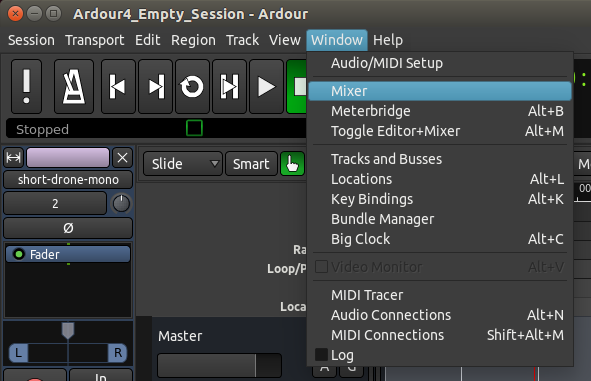
Mixer Window Controls
The second window, the Mixer Window, can be viewed by going to the main menu and clicking Window > Mixer.
The main function of the Mixer Window is to display all the Mixer Strips for the various Tracks side by side for easy reference. This window is mainly used during the Mixing process, and it also provides access Plugins and other Routing features. See the chapters on Understanding Routing, Mixing and Using Plugins for details.
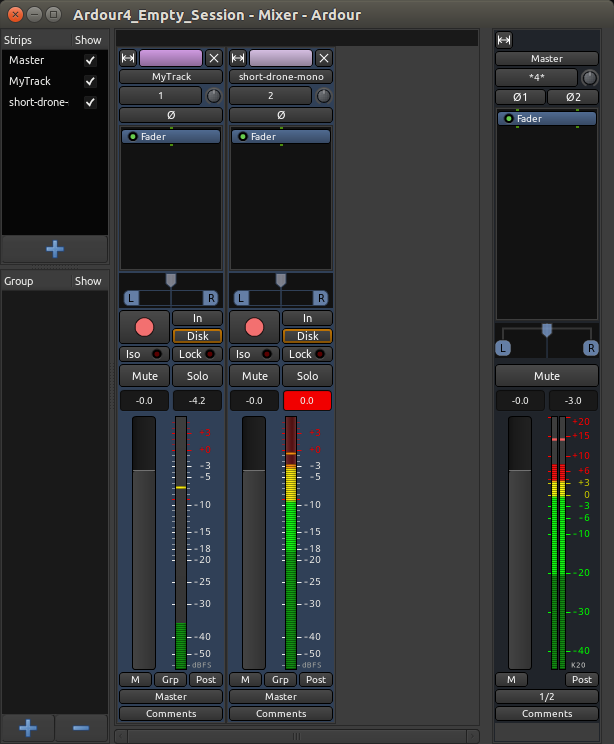
This window also contains a listing of the available Mixer Strips in the upper left hand corner. The check boxes in this area can be used to view and hide the Mixer Strips of the different Tracks. Finally, there is an area for managing Groups.
Switching Between Windows
You can use the key combination “Alt” + “M” (“Control”+ “M” on a Mac) in order to toggle which window is on top: Editor or Mixer.
Detaching and Reattaching Menus
Most of the major menus in the Editor Window can be detached from the Editor Window by clicking the white, downwards pointing arrow on the far right-hand side of that menu.
The detached menu will become a separate window on your screen, which can be reattached to the Editor Window by clicking the white, upwards-pointing arrow which now appears on the far right-hand side.
Continuing
The next chapter will explain how to start a fresh new project.
Next: STARTING A SESSION