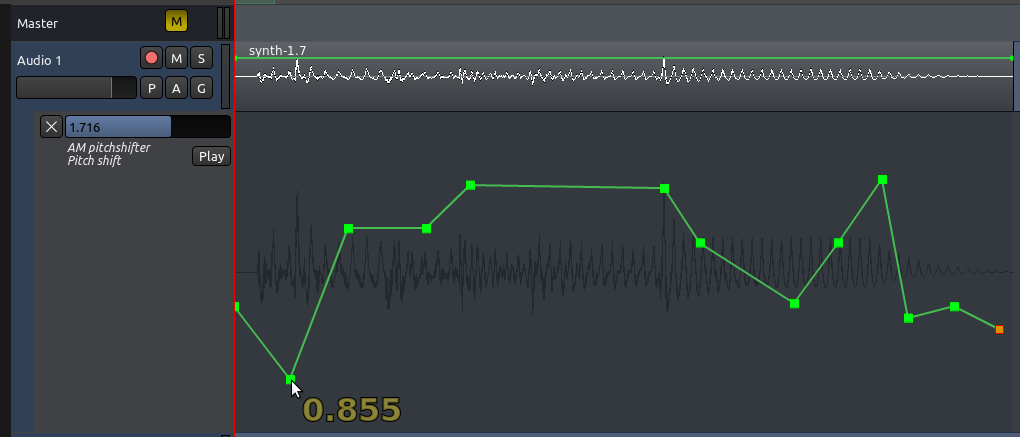
A Send is just an extra output for a Track or Bus with its own separate Fader that can be used to route the signal to other points in Ardour.

Also known as Auxiliary Sends, they tap the signal at a specific point in the signal flow (pre-fader, post-fader, before or after EQs and other plugins, etc.) and send a copy of that signal somewhere else, without affecting the normal signal flow downwards to the channel fader.

In Ardour, you can easily add Sends to Tracks and Busses through the Mixer Strip. Sends are Processors, just like Plugins.

When is a Send useful?

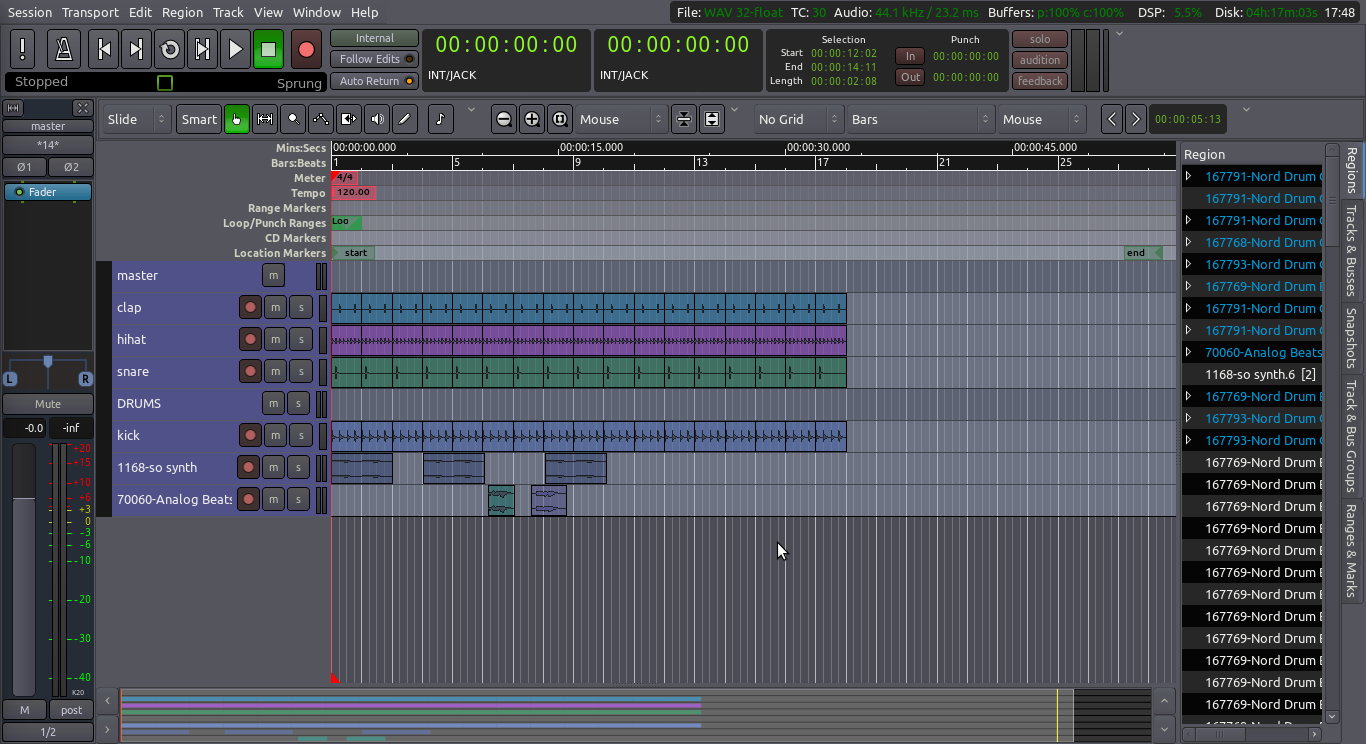
In earlier chapters, we built a drum kit pattern with four separate tracks: kick, snare, hihat, and clap. Let’s say now you’d like to add a reverb to the drums. You could of course add a separate plugin for each individual track, and tweak their settings separately, but this method unnecessarily increases the amount of work. Every time you want to change a reverb setting across the board for all drums, you’d have to open all four reverb plugins and change them in the same way.

This is where Sends come in handy: you can use them to add a particular effect to a set of Tracks without creating multiple instances of the same Plugin.

Here’s the overview of how we will do this:

  • Create a single Bus with the desired Plugin.
  • Add a Send to each drum track to which you want to apply the effect.
  • Route these Sends to the Bus.

Creating the Bus and adding a Plugin

Create a Bus (menu Track > Add Track, Bus, or VCA…), name it appropriately, and add a Plugin in the Pre-Fader Region (right-click just above the Fader blue rectangle in the Processor Box), as discussed in the chapter Using Plugins.

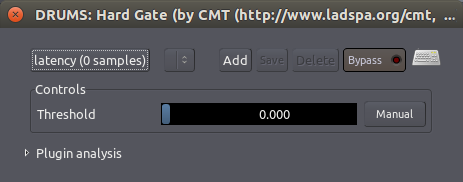
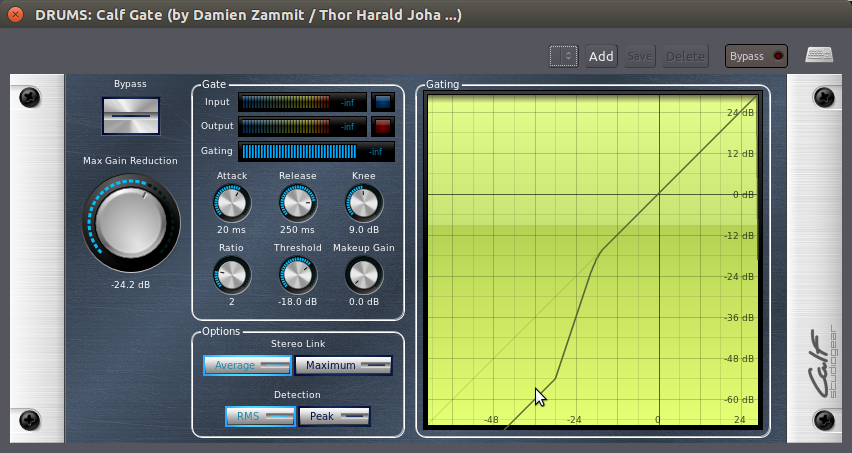
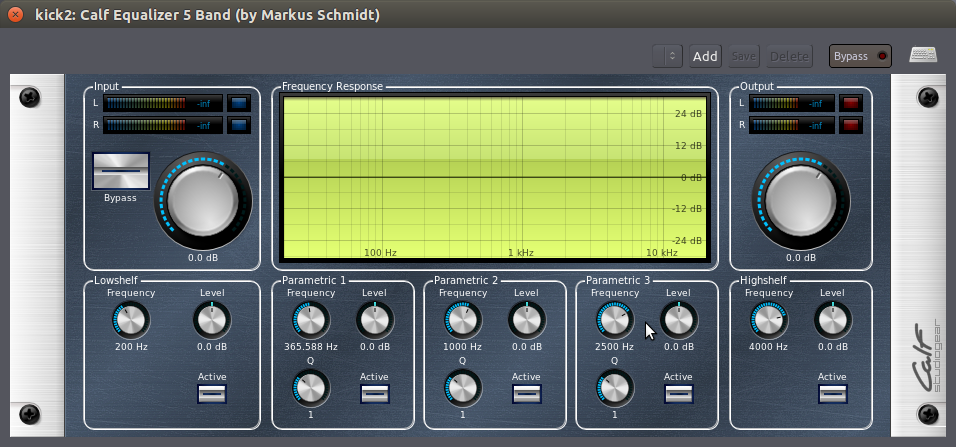
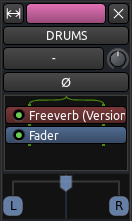
In this example, we have created a Mono Bus called “DRUMS”, and added the “Freeverb” Reverb LADSPA Plugin to the bus.
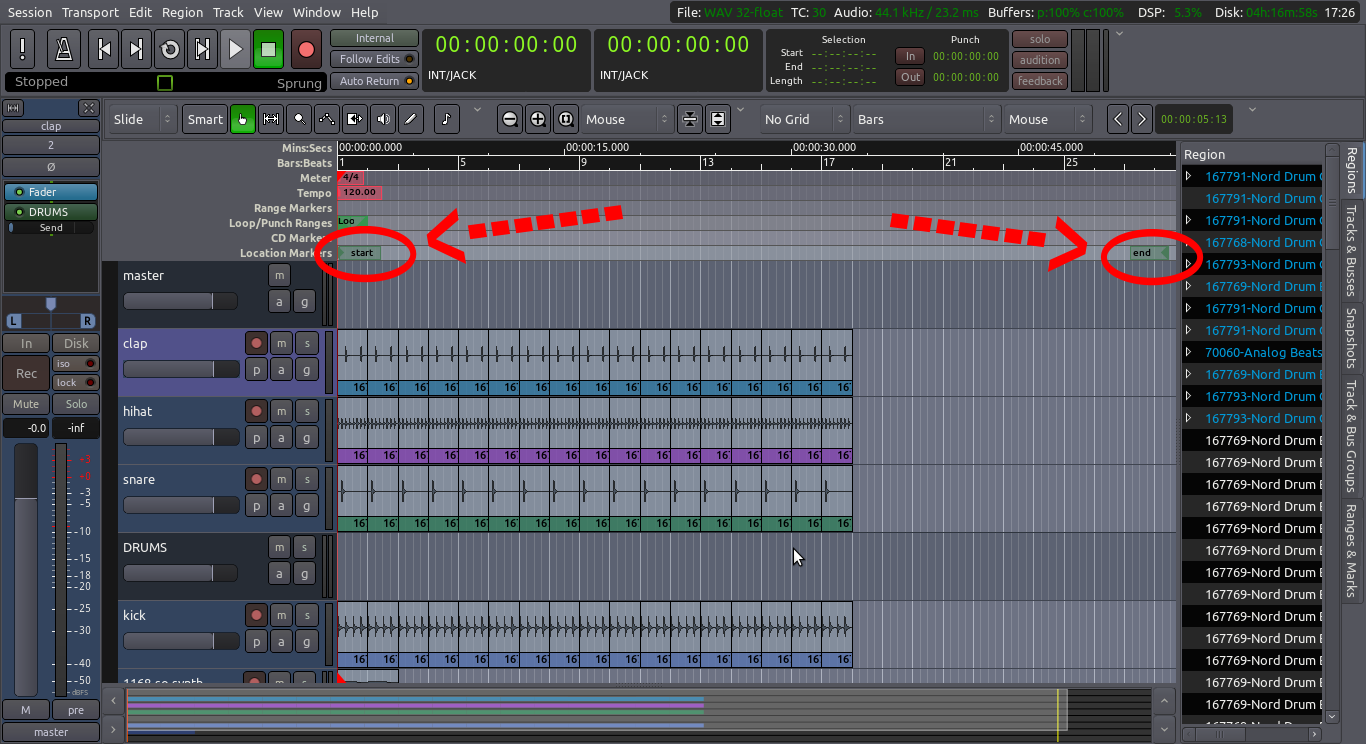
sends1

Bus inputs

The “-“ display in the Bus Input button indicates that nothing is routed to this bus yet. We will take care of this later.

Bus output

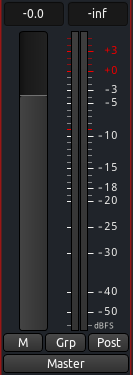
Before routing a send to this Bus, first make sure that the Bus outputs are Routed to the Master Bus, as shown below (button at bottom reads “master”).

sends2

Also, open the Plugin Window (double click on the Freeverb rectangle) and set the Plugin’s signal mix to 1.0 Wet Level and 0.0 Dry Level.

sends3

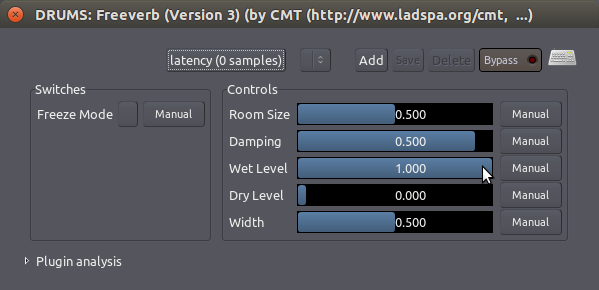
This ensures that the Bus carries all of the processed signal (the ‘Wet’ signal) from the Plugin, and none of the unprocessed signal (the ‘Dry’ signal) to the Master Bus. Remember, the unprocessed, ‘clean’ signals are still available from their original tracks, so there is no need to duplicate them in this Bus.

Creating and Routing Sends

Now we can create Sends in the other Tracks and route them to the Bus inputs.

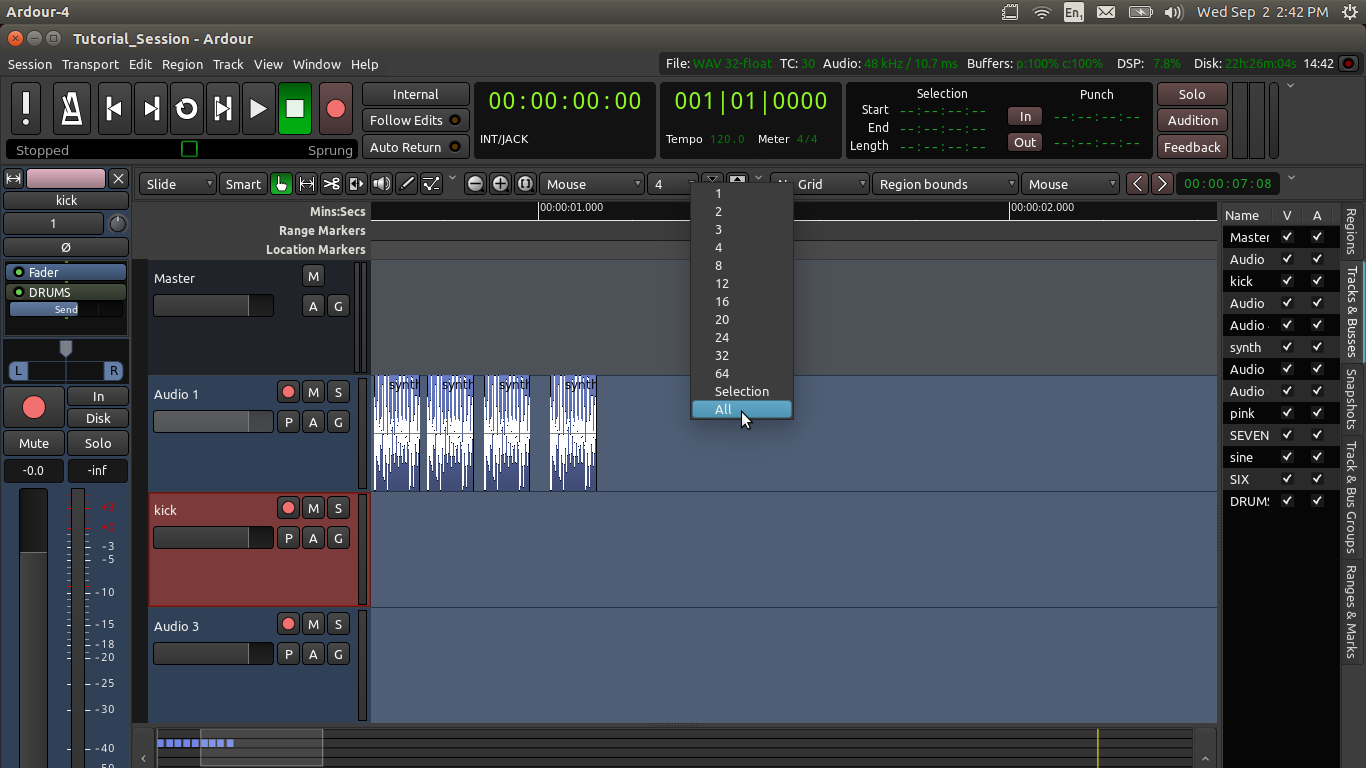
Like Plugins, Sends are also created in the Processor Box. Go to each of your drum tracks, right-click in empty space of the Processor Box, and create a New Aux Send… directed to the appropriate Bus (in our case, named DRUMS).

sends4 

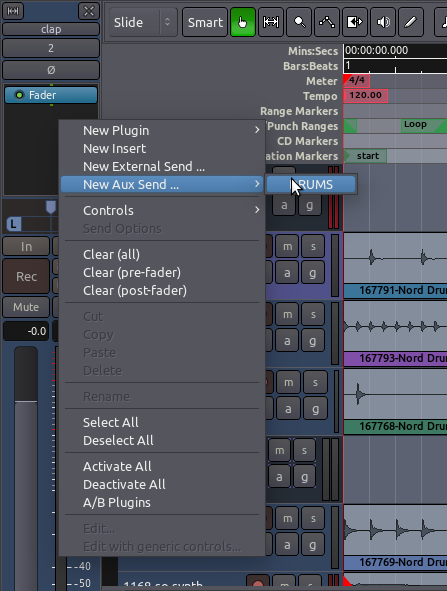
TIP: If you do not see the “New Aux Sends…” option in the menu, it’s probably because you did not create any bus yet. Go back to the previous step to create the bus.

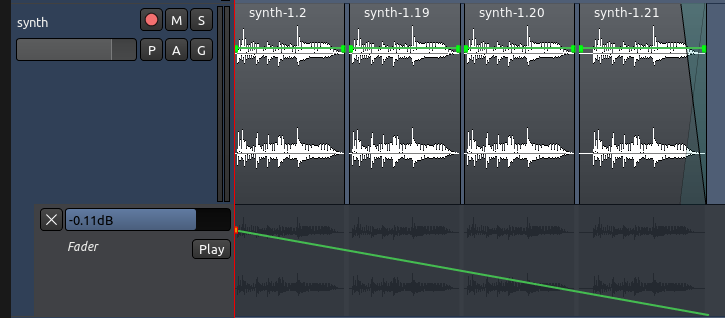
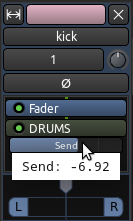
You should now see the Send displayed in the Processor Box:

postfader 

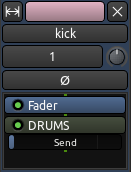
The little “Send” slider you see just below the green rectangle is the Send Fader, which controls how much sound will be sent from this Track to the Bus.

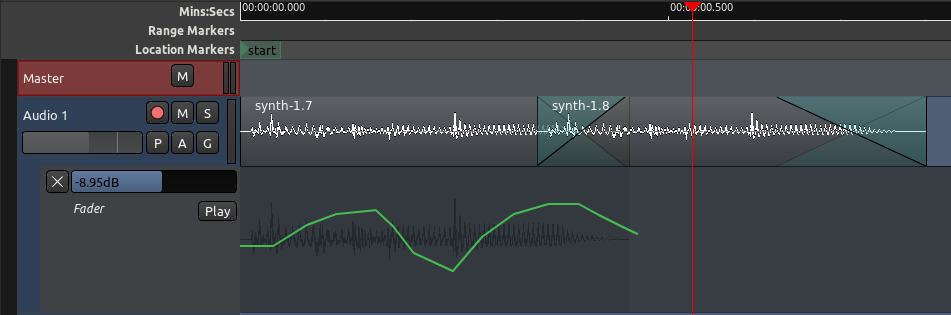
Post-Fader vs Pre-Fader Sends

Notice that the image above shows a Post-Fader Send (it sits “after” the Fader rectangle). In Post-Fader Sends, the Send Level is controlled first by both the Track/Bus Fader and second by the Send Fader.

In a Pre-Fader Send, on the other hand, the Send Level is controlled only by the Send Fader, independently of the Track/Bus Fader. A Pre-Fader Send would look like this:

prefader 

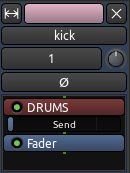
You can drag the Send rectangle up and down the Processor box to make it Pre- or Post-Fader as needed.

TIP: The choice of Pre- or Post-Fader depending on the type of effect Plugin used and the desired result. For this exercise, either one will work.

A Send behaves just like any other Plugin in the Processor Box. You can deactivate it temporarily by clicking on the small “LED”, and you can right click on the rectangle to access other options, including “Delete”.

Send Fader

To control level of each Send, simply click and drag the Send Fader to increase or decrease its volume.

sendfader 

The DRUMS Bus is now receiving the sum of all tracks, and applying the effect to it. A single Plugin applied to the Bus controls the effect for the mix of all drum sounds routed there. This way, you have independent control over the “dry” sound of the original tracks, and the “wet” sound of coming out of the Bus.

Because Sends are very useful for this kind of work with effect Plugins, they are also commonly called “Effect Sends”.

Continuing

Now that you know how to Add Plugins to a Track, as well as how to Add Sends to Tracks to create Plugin Busses usable by any number of Tracks, it might be helpful to learn about a few other Plugins useful in the Mixing Process. Please continue on to the following chapters covering Dynamics and Equalizing.

Next: DYNAMICS

One of the problems you may encounter in a Mix is that the loud parts are too loud, and/or the quiet parts are too quiet.

This kind of problem cannot be easily solved using Faders to adjust the Levels alone. You may set the Levels so high that they clip, or you may add unwanted background noise by simply turning Levels up. These are all problems with what is called the Dynamic Range, i.e., the difference between the loudest and quietest parts of your Session. There are several types of tools for adjusting the Dynamic Range available as Plugins within Ardour, including Limiting, Compression and Gating.

Limiting

A Limiter is a tool that prevents the volume of a Track from going over a certain Level, usually the Peak Level (0dB) or something close to it. Many Limiters have the option to boost the Levels of the incoming signal before they are Limited, and in this way you can “close the gap” between the loudest and quietest parts of your Mix. A Limiter can be used on the Master Bus to prevent the overall Mix from Clipping. Limiters are almost always used Post-Fader.

In the example below, a Plugin named “Fast Lookahead Limiter” is used (if you don’t find that specific one among your installed plugins, look for any other called “Limiter”). To set how much it limits, simply adjust the “Limit (dB)” slider. The Fast Lookahead Limiter literally “looks ahead” in the signal by a few milliseconds, and when it sees that the signal is about to go over the limit you have set, it automatically turns the Levels down.

limiter

The “Input Gain (dB)” slider determines how much the Levels are increased before they reach the Limiter, and the “Attenuation (dB)” meter on the right-hand side shows how much the Levels are being reduced at any given moment. While the reduction in volume is nearly-instantaneous, the “Release time (s)” slider determines how long it takes the Limiter to return to 0 Decibels of Attenuation.

Note that the “harder” one drives the Limiter (by increasing the Input Gain and/or decreasing the maximum Peak Limit allowed), the more reduction the Limiter is forced to make, and the more likely it is that Artifacts of the processing will occur (such as Distortions or erratic changes in volume). On the Master Bus, it is generally best to avoid excessive Limiting.

Compression

A Compressor boosts the overall volume of a sound, but then “squeezes” it depending on how loud it is. This can make vocals sound more even or drums sound fuller and louder. The end effect is similar to how a Limiter can reduce the range between the quietest and the loudest sound, however the effect is more selective when using a Compressor.

The simplest Compressor has relatively few controls, such as the “Simple Compressor” Plugin shown below. Here, the “Threshold” sets the Level at which the Compressor will start to act, and the “Compression Ratio” controls how much the Compressor will “squeeze” the sound. The “Attack” and “Decay” parameters control how quickly the Compressor affects the sound.

simple compressor

A more complex Compressor, the “SC1 Compressor” Plugin, is show below.

sc1 compressor

It has three main buttons:

  • Threshold level (dB)” sets the level at which the Compressor will compress or squeeze the sound.

  • Ratio (1:n)” controls how much it will squeeze when it reaches the threshold.

  • Makeup gain (dB)” boosts the whole signal after the Compression occurs.

To soften out a vocal, for example, you could set a “Threshold level” of −10dB or so and a “Ratio” of 2.5, and then bring the volume back up with the “Makeup gain”.

The other three controls—”Attack time (ms)”, “Release time (ms)” and “Knee radius (dB)“—allow you to control the shape of the Compression.

For soft vocal Compression, you would want a semi-fast “Attack time” so that the Compressor catches the beginning of each word, a slower “Release time” to let the voice ring out, and a soft “Knee radius” to create a gentle form of compression that isn’t too noticeable.

If you want to make drums sound big, you might try a slow “Attack time” so that you don’t Compress the pop of the drum, a fast “Release time” so that the Compressor can catch the next hit of the drum, and a large “Ratio” to make the Dynamics between the beginning and end of the drum hit similar.

Below is a screenshot of a similar Compressor from the Calf Plugins Package:

sc1 compressor

Gating

The simplest kind of Gate allows a signal to pass through when it is over a certain Level, and blocks the signal when it is lower than that.

Gates are often used as a kind of noise reduction. For example, the Gate on a microphone channel might only open while the singer is singing, preventing other background noises from coming through as well when she is not singing. Gated drums are also a very well-known studio production trick to make them sound “sharper”.

Here, the “Hard Gate” Plugin displays a single control parameter, the “Threshold” at which the Gate will open and let the signal through.

gate

Other kinds of Gates, such as the Calf Gate Plugin, are more complex. They have independent control over how quickly the Gate opens (the “Attack”) and closes (the “Release”), as well as other parameters quite similar to those described for the SC Compressor above.

gate2

Continuing

Now that we’ve explored some tools for getting the Dynamic Range exactly where you want it, it’s time to look at adjusting the balance of Frequencies present in each individual Track and in your overall Mix. In the next chapter, we’ll learn how to use the Equalizer to do just that.

Next: EQUALIZING

An Equalizer (or EQ) allows you to separately control the gain of different frequency ranges of a sound.

This can be useful not only to sculpt the timbre of an isolated sound (for example, to make it sound ‘sharper’ or ‘smoother’), but also to make sounds of various timbres to integrate better into the Mix.

Often, even after adjusting Levels and Panning, different tracks with similar frequency content (for example, a bass guitar and a kick drum) may be difficult to tell apart in the Mix. An Equalizer is a good tool to address this.

3-Band Equalizer

The simplest kind of Equalizer is the one familiar to us from analog mixers. It has three parameters, which adjust the Levels of three Bands, or frequency ranges: one for the Bass (low frequencies), one for the middle range frequencies and one for the Treble (high frequencies). The “DJ EQ” Plugin is just such an EQ. If you don’t have this particular plugin on your computer, explore the ones you have that have “EQ” in the name; you will likely find something similar.

dj eq

Multi-Band (or Graphical) Equalizer

A more complex Multi-Band (or Graphical) Equalizer often has a lot more Bands. Each Band is centered on a frequency, and the Level of each Band can be independently adjusted. In some Multi-Band EQs, such as the “TAP Equalizer” Plugin shown below, the center frequency of each Band can be defined by the user. This allows you to either attenuate (or remove) an unwanted frequency, or to reinforce (boost) a desired one.

tap eq

The overall “curve” of the Bands can also be used to determine the general tone of your Track or Mix. In the example above, the lower part of the mid-range frequencies have been “scooped out” a bit (note how Bands 1 and 8 are left untouched at 0 dB, while intermediary Bands 2 to 7 draw an attenuation curve, with Band 4 at -15 dB as the lowest point).

Parametric Equalizer

The Parametric Equalizer is the most versatile type of EQ used for Mixing because of its extensive control over all types of EQ parameters. Ardour ships with a Parametric Equalizer plug-in called the “a-EQ”. It looks like this:

a-eq

Others may have shinier graphical interfaces like this one from the Calf Plugins package, but they all essentially do the exact same thing. You may have EQ plugins on your computer that look a bit different than these screenshots, but the parameters you can control are likely very similar.

calf eq

In both screenshots above (a-EQ and Calf EQ), there are options you can adjust for each frequency band. Each of the three bands has a “Level (dB)” adjustment to cut or boost frequencies, a “Frequency (Hz)” adjustment to select center frequency, and a “Q” adjustment (between 0 and 1) which determines how wide the range of frequencies to be affected will be.

High Shelf, Low Shelf

Both plugins shown above (a-EQ and Calf) also contain a High Shelf and Low Shelf. A Shelf cuts or boosts everything above (High Shelf) or below (Low Shelf) a specific frequency. For example, a Low Shelf can be used to remove unwanted rumbling sounds, and a High Shelf can be used to reduce hiss. The “Frequency” control of a Shelf determines the cut-off frequency. For example, a Low Shelf with cut off frequency 200 Hz means that the equalizer will attenuate everything below that frequency. The amount of attenuation is controlled by the Level knob. Notice that neither the High Shelf nor the Low Shelf have a Q parameter.

An Example of Using an Equalizer

In order to achieve a better separation of two instruments in the Mix through the use of EQ, you first need to find out where the two instruments overlap.

Here’s one approach. Using a-EQ or any equivalent EQ plugin, select an appropriate Band for one of the instruments. In the case of a bass guitar, it would be a low frequency band (start at, say, 100 Hz). Boost the “gain” to 10dB, change the “Q” (also called “bandwidth”) so that is a narrower range, and then scroll the “frequency” up and down slowly. You’ll hear a pitch move up and down. Then scroll it down slowly until you hear the frequency range where the two instruments overlap. Now simply reduce the “gain” to -5dB, and you will hopefully hear the instruments a bit clearer. Next, apply the same process to the other instrument.

There are many approaches to EQ. Hopefully this will provide one example of how to begin EQ’ing Tracks in your Mix. But most importantly, when it comes to EQ, it is better to use too little than too much, unless you’re consciously using extreme EQ as a compositional parameter.

Continuing

You should have enough tools now to create a clean, well-balanced Stereo Mix of your Session. However, if you want the parameters of your Faders, Panning or Plugins to change over Time, then you will want to explore the Using Automation chapter next. If not, then skip ahead to learn how to Export Sessions in the following section.

Next: USING AUTOMATION

Automation is a way of dynamically changing audio processing parameters over time.

Up to now, we have used fixed values for various parameters of our Tracks (for example, a Track Fader set to -3.0 dB; or a Mono Panner set to 100% Left; etc.) These fixed values would apply for the entire Track throughout the whole Session.

But what if you would like these values to change over time in a pre-determined way? For example, you may want to have the Gain of a Track to gradually decrease over twenty seconds. Or you may want to make a sound move from Left to Right over two seconds.

This is accomplished with Automation. The Fader, Panning, and any of the parameters of the Plugins used in that Track can be automated. An automated parameter is displayed underneath the parent track in its own Automation Track. Automation data is visually represented as an Automation Line, made up of a number of Automation Points. Here’s how a track with Automation looks like:

automation1

In the image above, the Automation Track called “Fader” is associated to the parent Track called “Audio 1”. The Automation Line controls Fader (volume) changes over time.

Creating a Fader Automation Line

Let’s create a simple Fader Automation. Click the “A” button of a chosen track. A menu will appear, where you can select the parameter you would like to Automate. Choose “Fader”.

automation2

An Automation Track will then appear. Select the Draw Mode (shortcut “D”):

automation3

Now you can create Automation Points by clicking anywhere in the Automation Track. An Automation Line joins the Automation Points you add. The yellow number (-15.3 decibels in the image below) indicates the Gain level for the selected Automation Point.

automation3

Automation States

The Automation Curve will not play, however, until you set the Automation State to “Play”.

automation state

Manual: When set to “Manual”, the Track will ignore any Automation data. It will just play with whatever volume is the Fader is set to. In this mode, you are able to move the Track Fader by hand to set a new fixed level. That’s the default behavior of a Track when it’s first created.

Play: When set to “Play”, the Track will automatically change the Gain levels following the Automation Curve drawn in the Automation Track. You will no longer be able to move the Track Fader by hand. During playback, you will see the Track Fader moving up and down according to the curve.

Write mode will continuously record user changes to the Automated parameter as the Transport plays, creating an Automation Line. For instance, you may start playback and then make real-time changes in gain using the Fader of your Track. All the changes you make will be written (recorded) as an Automation Line, which then you can play back later by switching the Automation Mode back to Play

Touch mode is similar to Write mode. Unlike Write mode though, Touch mode won’t record over existing Automation data unless the parameter is being changed.

If these concepts are new to you, focus now on just the first two modes (Manual and Play), and practice creating automation by drawing Automation Curves by hand.

Creating a Plugin for Automation

You may add Automation to any Plugin which has already been added to a Track. In the example below, we have a “AM pitchshifter” Plugin added to a track.

pluginautomation1

In order to select a Plugin parameter for Automation, click the button on the Track marked “a”. The menu will appear. Under “Processor Automation” you will find a listing of the Plugins you have added for that Track.

pluginautomation2

Within each listed Plugin, you may choose which parameter you want to Automate from a list. In the example, we chose the parameter “Pitch shift” of the Plugin “AM pitchshifter”. An Automation Track for that parameter appears. Note that as you open several Automation Tracks, they will appear one after the other below the main parent Track.

Draw an automation curve for that parameter. Don’t forget to set the Automation State to “Play”.

pluginautomation3

In the image above, the pitch shift of the sound is now changing over time, controlled by the curve.

TIP: You can hide an Automation Track by clicking on the “X” at the upper left corner of the Automation Track. Note that a hidden Automation Track continues to function even when it is not visible.

Adding Better Visual Resolution to Automation

You can achieve a greater amount of vertical precision by increasing the height of the Automation Track. Move your cursor near the lower edge of the Automation Track. The pointer turns into a vertical double arrow. Drag it down to increase the height of the Automation Track. Notice that the parent Track and the Automation Track heights are independent, so while working in your Automation Curves you might set them up like this:

pluginautomation5

TIP: Remember you can also Zoom In and Out to increase resolution in the horizontal axis.

Working with Automation Points

There are several ways ways of adjusting Automation Points, depending on the editing mode you are in:

  • An Automation Point can be dragged in any direction with the mouse (works in Grab, Draw, and Edit modes).

  • To remove an Automation Point, hold down the “Shift” key while Right-Clicking on it (works in Grab, Draw, and Edit modes).

  • Edit Mode only: any segment of the Automation Line between Automation Points may be dragged vertically, affecting both end points at once, without affecting their horizontal position. Simply click somewhere on the line between two points, and drag up and down.

  • How to delete multiple Automation Points at once (Grab Mode and Edit Mode only): select multiple Automation Points by dragging a box starting on the track background around the points. Then the selected points may be deleted by hitting “Delete” (notBackspace”). If you are on a Mac and do not have a true “Delete” key, try “Function” + “Backspace”).

After an Automation Curve ends, its value will stay at that level for all subsequent regions, whether or not you have drawn a continuation of the curve.

end point

In the example above, the last point of the curve is at -23 decibels. That same level will be kept for the remainder of the Track, even though the line is not drawn until the end.

Moving Automation

Moving a Region to a new location will automatically move the Automation data that might be aligned with it, as we can see in the following screen shots.

Before moving: mv1

After moving: mv2

You can change this behaviour if you like. In other words, if you want automation curves to stay where they are even when you move Regions around, go to Edit > Preferences > Editor and uncheck “Move relevant automation when audio regions are moved.”

Region-specific Gain Automation

There is a way to create a gain automation directly bound to a Region. When you select Draw Mode, you should see a flat line on the top half of each Region rectangle:

gain-automation

Click directly on that line to create Automation points. These will be drawn directly on the Region itself, unlike Fader Automation which is drawn or recorded in the Automation track. Region Gain Automation is separate from, and in addition to, Fader Automation.

gain-automation2

As with the Automation Tracks, a Gain Automation Point can be dragged in any direction with the mouse. To remove a Gain Automation Point, hold down the “Shift” key while Right-Clicking on it.

Deactivating and Removing Gain Automation

Gain Automation can be reset or deactivated from the Region context menu, which is reached by Right-Clicking on the Region.

gain-automation3

Here, the Gain Automation is referred to as the Envelope.

Reset Envelope” removes the Gain Automation Points you have drawn in the Region.

Envelope Active” toggles the Gain Automation Envelope on and off.

When should I use Region Gain Automation or Track Fader Automation?

As seen above, both are very similar. With practice you will notice situations in which one is more convenient than the other. Here are two examples:

  • If all you need to do is a little touch up (cut or boost gain) in a specific portion of a Region, and you are otherwise happy with the level for the Rest of the passage or entire track, use the Region-specific Automation.

gain-example1

  • If you have a more complex Track with crossfades over Regions, and/or need to shape a longer dynamic curve across several Regions on the same Track, use Fader Automation.

gain-automation2

The screenshot above shows a simple gradual fade starting from the first Region in the track, and ending at the last Region. It’s very straightforward to do this with Fader Automation, but but it would be much harder to do it using region-specific automation.

Continuing

Once you have your Automation in place, you are just about ready to Export your Stereo Mix to an audio file which you can listen to, burn as a CDR or convert to an MP3/OGG to share on a website. Please continue on to the next section, Exporting Sessions, to learn the different ways of doing this.

Next: EXPORTING A SESSION

Exporting is the process of saving a Region, Track, or entire Session to a file on your computer which you can listen to, burn as a CD-R, or convert to an MP3 to share on a website.

Export the Entire Session

Once you have finished your composition, the most common export operation is to export the entire Session to an audio file.

Bird’s Eye View of Entire Session

At this point it’s a good idea to Zoom Out and take a look at your whole session before exporting.

  • Select “All” from the menu “Number of visible tracks”:

track heights

  • Click on the “Zoom to Session” button (third button in the Zoom Options):

zoom options

  • You should now have a nice overview of your whole session, like this:

birds eye view

Listen to your piece one last time and make sure you hear everything the way you want (any Solo or Mute button you forgot to deactivate? Any volume adjusment left to do? etc.)

Start and End Markers

Finally, make sure the Start and End markers are in the right place.

start end

Everything included between the Start and End Location Markers in the Timeline will be exported, so you have to set the markers first if they are not in the correct position. In the image below, clearly the End marker is too far to the right in the timeline. This will result in a huge silence after the end of the piece (that is, between the last Region and the End marker).

export session

If your End marker is too far after the end of your piece, click and drag it to the left until it is pretty close to the end of the very last Region of your composition.

Export it!

To Export a Session, use the top menu: Session > Export > Export to Audio File(s)…. This will open up a dialogue box with several options.

export session dialog

  • Preset: this is NOT where you write the file name. Don’t worry about this field now.
  • Format: this allows you to choose the file format (WAV, MP3, OGG, FLAC, etc.). The default is CD (Red Book), which will give you a WAV file.
  • Add another format: if you’d like to export in more than one format at the same time, click on this tab.
  • Location: this is the place where you will find the file after it is saved. By default, it is in the “export” folder that lives inside your main Session folder. You could also click “Browse” and select the Desktop, for example.
  • Label: THIS is where you can create a unique name for the file. Ardour will automatically append the session name to the exported file, so if you don’t write anything here the name may end up something generic like “my-session.wav”. Use this field to give a unique name to your file.

Having chosen your options, click Export. After the operation is finished, you can find the file using your file browser.

TIP: Export is handled through the Master Bus, so the final file will include all the sounds from Tracks and Busses that were routed to it. This will include any Normalizing, Fading, Panning, and Automation you have created, along with the individual edits made to the Regions as well. If any of the Tracks have the Mute or Solo buttons engaged, this will also affect which Tracks will be heard in the Exported file.

Advanced Options

Click on the tabs “Time span” and “Channels” in case you need to access advanced export options.

Continuing

At the end of this chapter, you now have an Exported Stereo Mix representing your entire Session. You may also want to know how to export individual Regions or selected Ranges from your Session. This will be covered briefly in the next two chapters.

Next: EXPORTING REGIONS